This site uses cookies to provide you with a better experience. By clicking on "Accept" all categories of cookies will be activated. To decide which ones to accept, click on "Customize" instead. For more information you can consult the page *** Cookie policy.


How to paint a Vespa
Posted on 24.06.2021How to paint a Vespa? What do you really need? Method and tools change according to the type of work you want to perform on your two-wheeled vehicle and your needs. It is not always necessary to completely repaint the entire Vespa. In some cases, if you have the right tools, you can do it yourself, in others, however, it is always good to rely on serious professionals of the trade who know the Vespa and in general the world of two wheels in detail. The way of painting a Vespa then changes if we are talking about a vintage Vespa and above all if we want to respect in all respects its characteristics and peculiarities, thus bringing it back to the ancient glories of the past. In fact, the same products used in the years of construction of the legendary Piaggio scooter are needed. An example? Nitro, anti-rust paints and various fillers.
What it takes to paint a Vespa
What do you really need to paint a Vespa? Are there any very expensive equipment? Before even talking about the necessary tools, it is good to clarify immediately that the painting work on a Vespa must be carried out in a well-ventilated room or outside the home garage. You will certainly need large tables or shelves to work on, sheets to cover floors and walls or other objects. Those who paint the legendary two-wheeler will also have to equip themselves with various personal protective equipment such as: gloves, mask and goggles. Better to wear, moreover, either a work suit or old clothes that you can possibly dirty with paint in case something goes wrong. Among the necessary work tools, however, there are certainly the following: "compressor of at least 100 liters" airbrush "spatulas" nitro paints "anti-rust" putties "enamelsHow to paint a Vespa: the steps
What steps need to be followed? Here is step by step how to paint a Vespa. 1. Prepare the support, 2. Remove all parts of the Vespa that will not be painted 3. Sandblasting 4. Cleaning 5. Restore the missing parts or those corroded by rust 6. Apply the primers, 7. paint 8. Apply the enamel 9 .Touch 10.finish. Once a Vespa has been disassembled with care and extreme attention, the pieces are hoisted to be painted on a support. Experts advise not to pick up the paint immediately. The color only needs to be applied at a later time. First of all, it is good to check the entire chassis inch by inch and fix the bodywork. In order to spread the paint evenly, it will be necessary to remove all the imperfections of the sheet and repair the various dents. Right now, therefore, a phase of those listed above seems to be fundamental. Which? That of sandblasting. Through it you get to remove all the rust. If you opt for sandblasting, however, it becomes important then to pass the epoxy primer and block the oxidation before grouting and repairing the imperfections.Sandblasting yes or sandblasting no?
Vespa lovers and simple admirers, in the forums dedicated to two-wheelers that have gone down in history, they discuss animatedly about the possibility of carrying out a good sandblasting or not. In the quarrel there are many who take sides in favor, but just as many who take sides against. What can be the tip of the balance to make the most correct decision and paint your Vespa perfectly? Obviously the state of health of the vehicle. If you are dealing with a frame with more paint or with enough rust it is advisable to perform a good sandblasting. What is it about? This operation allows to eliminate the oxidations in a deeper way or to remove the existing paint more quickly. Only problem? Perhaps the cost. The price goes up, but if you want to do a good job, you need to spend a little more from the beginning to avoid having to redo everything. Those who do not lean towards good sandblasting, on the other hand, point the finger at the fact that the sheet, once discovered by the sand, is immediately subject to oxidation. However, with the use of an epoxy primer you can stop the problem in the bud and continue to work in peace. What are the other steps to paint a Vespa? The filled and restored parts must be sanded. Once the primer has been applied and the anti-silicone has been applied, it is finally possible to prepare the acrylic for bodywork. How is the color applied? Respecting the colors of the time, the paint can be spread by passing three coats with the use of an airbrush with 1.7 or 1.8 nozzle.Fundamental colors and backgrounds: how to paint a Vespa?
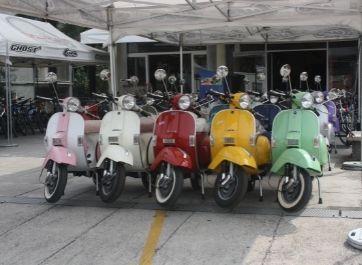
Spreading the background and color seems, after all the previous actions, the simplest thing. Thus, it is not. First of all you have to pay attention to the colors by carefully studying the complementary colors and avoiding getting unwelcome surprises. Why? If a gray background is applied, a yellow tint cannot be applied. In fact, there is a risk of influencing the tonality of the final color and of deviating from the original color of the legendary two-wheeler. For a yellow Vespa it must have a white background. For a red Vespa, on the other hand, you can have a black or gray background. The choice of color is therefore also fundamental to establish the technique with which the Vespa will be painted. The reason? Depending on the pastel or metallic colors, it is possible to use the direct glossy paint technique or the double layer technique with glossy transparent. The first technique comes in handy if you have to apply pastel shades. The second, on the other hand, for the metallic colors.Latest Headlines
- Discover the potential of the Stelvio 177 cylinder for your Vespa PX: a detailed guide Posted on 26.01.2024
- From the origins to the present day: The evolution of the Vespa 125 over the years Posted on 07.11.2023
- The disc brake kit: an essential upgrade for your Vespa 50 Special Posted on 18.10.2023
- How the Polini 130 cylinder can improve the performance of your Vespa Posted on 18.10.2023
- Buying guide for the Vespa 125 ET3: everything you need to know Posted on 17.10.2023
Search the Blog


